
Pushing and Pulling
Before pushing and pulling changes, your repository will need a remote to communicate with. When you clone a repo, a remote will automatically be added with the given URL. However if you created a new empty repo you will need to add a remote manually.
Adding a Remote
- Open a repository.
- Tap the i button in the upper right.
- Tap the Add Remote button.
- Set the name (usually origin) and url (see here for how to find the url) of the remote you would like to add.
- Tap Add.
- The remote will be added to your repository and appear in the repository info.
Removing a Remote
- Open a repository.
- Tap the i button in the upper right.
- Identify the remote you would like to delete.
- Tap the … icon next to the remote and then tap Delete Remote.
- The remote will be deleted from your repository
Pulling Changes
- Open a repository.
- Switch to the Status tab.
- Tap the Pull button.
- Choose the type of pull you would like to perform.
- Fetch and Merge (Default) - Local changes are merged with the remote changes
- Fetch and Rebase - Local changes are reapplied on top of the remote changes.
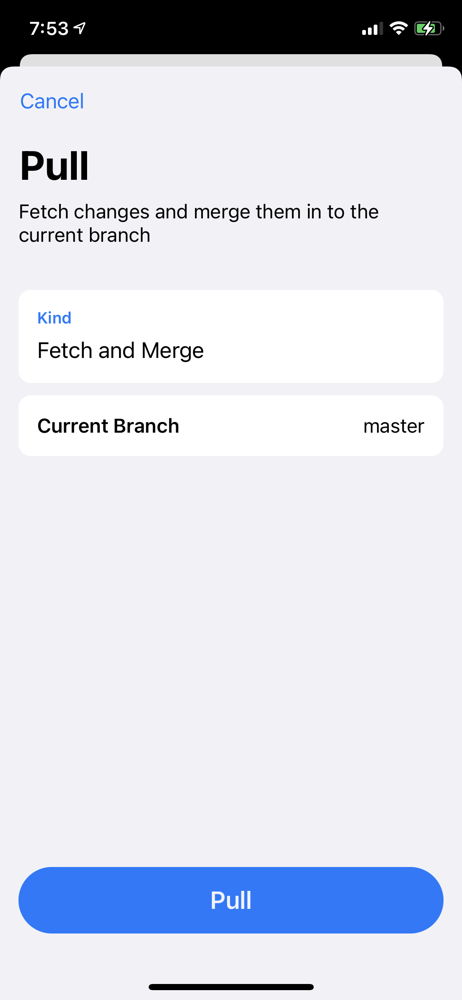
- Tap the Pull button.
- Remote changes will be pulled to your device.
- If there were conflicts merging or rebasing your changes, fix the conflicts and commit the result.
Pushing Changes
You will need write access to the remote repository to push changes.
- Open a repository.
- Switch to the Status tab.
- Tap the Push button.
- Select the branch you would like to push to the remote, and optionally enable force updating of the remote branch.
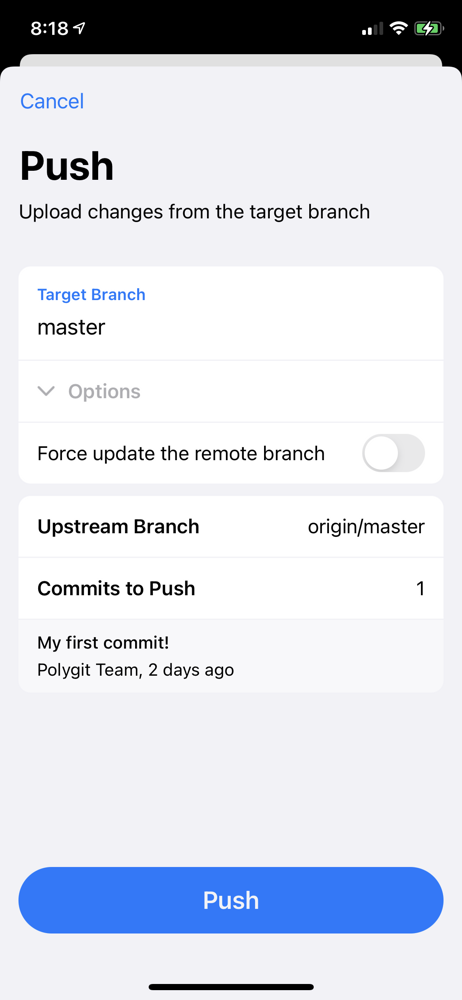
- Tap the Push button.
- Your local changes will be pushed to the remote repository.
- If you get the error “Cannot push non-fastforwardable reference”, that means someone else has updated the remote branch. Pull the remote’s changes and try again.